efms.goa.gov.in : File Management System (FMS)
Organisation : Government of Goa, Secretariate
Facility Name : File Management System (FMS)
Applicable State/UT : Goa
Website : https://efms.goa.gov.in/
| Want to ask a question / comment on this post? Go to bottom of this page. |
|---|
What is Goa File Management System?
File Management System (FMS) has been developed with the objective of providing the users with a simple solution to manage their documents and files in an efficient manner. FMS is a web-based solution and provides five different user interfaces such as Central Registry, Section Inward/Outward, Dealing Hand, Superuser and Administrator to meet the requirements of the different categories of the users. However, the user interface Administrator is for the exclusive use of National Informatics Centre(NIC) for maintaining the FMS.

Features of Goa File Management System
The following are the different features associated with the five user interfaces.
Central Registry :
The users of this category will have the options to enter details of documents received by their department, to forward documents to various sections, to enter documents that are to be dispatched from their department and to view the status of any document/file.
Section Inward/Outward :
The users of this category will have the options to enter details of documents received by their section, to inward documents marked to their section and then mark the document/file to a user, to outward documents from their section to any other section and to the view status of any document/file.
Dealing Hand :
The users of this category will have the options to to view the documents/files marked to the user, to view the documents/files marked out by the user, to open new files, close files, re-open files and also open and close part files, to transfer files held by the user to another user and to the view status of any document/file.
Superuser :
The users of this category will have the options to create users (without Superuser and Administrator roles) for their sections, to add/delete/modify services and supporting document details and to reset Inward/Outward numbers.
Administrator :
This category is exclusively for NIC. The users of this category will have the options to create users(only with Superuser role), to create different User Roles, to add/delete/modify the details base data tables and to create data archives periodically.
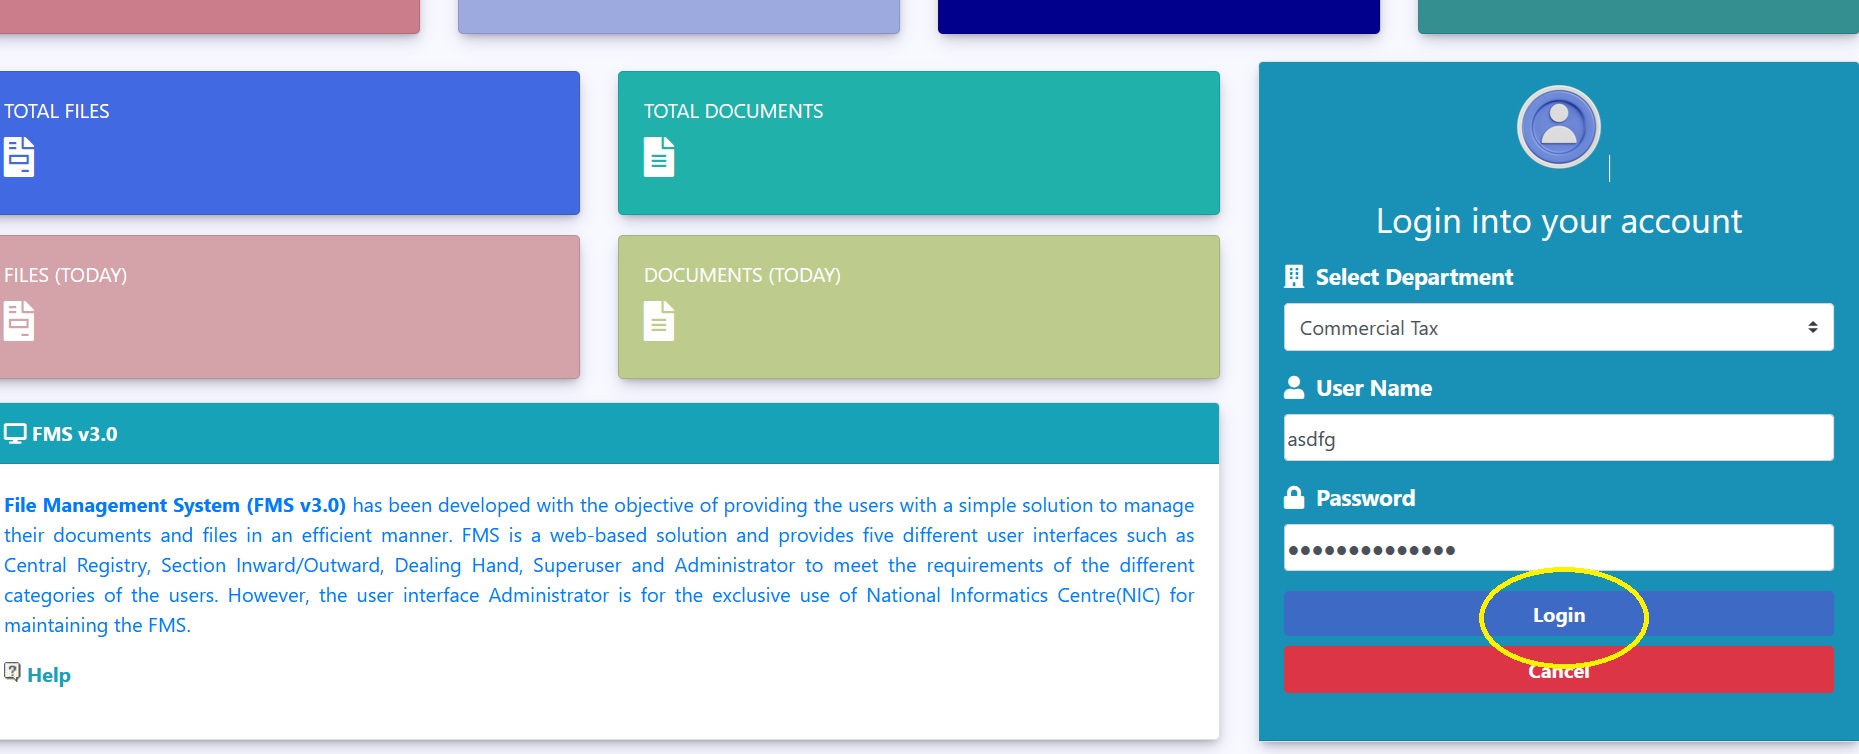
How To Login To Goa File Management System?
To login to Goa File Management System, Follow the below steps
Steps:
Step-1 : Go to the link given above
Step-2 : Select the Department
Step-3 : Enter the User Name and Password
Step-4 : Click On Login Button
Central Registry:
The various options available are for Central Registry user are:
** Entry: Use this option to enter details of documents received by this department.
** Forward : Use this option to forward documents to various sections.
** Dispatch : Use this option to enter documents that are to be dispatched from your department.
** Status : Use this option to view status of any document/file in your department.
Entry:
Use this option to enter details of documents received by this department.
** Click button “New” to enter new documents.
** Click button “Edit” to edit already entered documents.
** Click button “Search” to search for already entered documents.
** Click button “Save” to save entries.
** Click button “Clear” to clear entries in form.
** Click button “Close” to close form.
Note:
** In case you want to enter supporting documents check the checkbox “Supporting Documents”
** Select Service from dropdown in case the entry pertains to a service given by your department.
** Then check the required service documents from checkbox list provided.
** “Select Service” and “Required Docs” is disabled by default and will be enabled if you check, checkbox “Supporting Documents”
Forward:
Use this option to forward documents to various sections
** Click “Search=>” button to show the search fields. This button than changes to “<=Search”.
** You can search documents and files based on their numbers.
** You can also list all documents and files based on “Entry Date”, Priority”, “Section”
** The documents/files get populated in the grid below.
** To hide the search fields click “<=Search”.
To mark the documents to another section do the following:
** Select document by clicking on the document number.
** The concerned row will get highlighted.
** Click on the “Mark” icon to show the section dropdown.
** Select the section you want to forward the document to.
** Then click on the “Save” icon in the “Mark to” column in the grid.
** The section then appears in the “Section” column of the grid.
Note:
** You can view details of the document by first highlighting the document Number in the grid and than clicking “View” button.
** You can page through the grid by clicking on the page numbers displayed in the grid.
Dispatch:
Use this option to enter documents that are to be dispatched from your department. test …..
** Click button “New Entry” to enter new dispatch documents.
** Click button “Edit” to edit already entered documents.
** Click button “Save” to save entries.
** Click button “Clear” to clear entries in form.
** Click button “In Tray” to show the In Tray Grid.
** Click button “Out Tray” to show the Out Tray Grid.
** Click button “Close” to close form.
** “In Tray” grid shows you the documents/files that have been marked to you for dispatching by various sections.
To dispatch a particular Document/File do the following:
** Select document/file by clicking on the outward number.
** The concerned row will get highlighted.
** Then click on button “New Entry”. The subject gets reflected in the document subject.
** Enter the other details in the data form.
** Then click “Save” to save your document.
** Dispatch number will be generated and will be shown in the blue box. “Out Tray” grid shows you the documents dispatch entry has been done by you.
To edit a particular dispatch entry do the following:
** Select dispatch entry by clicking on the dispatch number.
** The concerned row will get highlighted.
** Then click on button “Edit”.
** The fields in the form get populated with the details.
** Make changes as required.
** Then click “Save” to save your document.
** The changes get reflected in the “Out Tray” Grid.